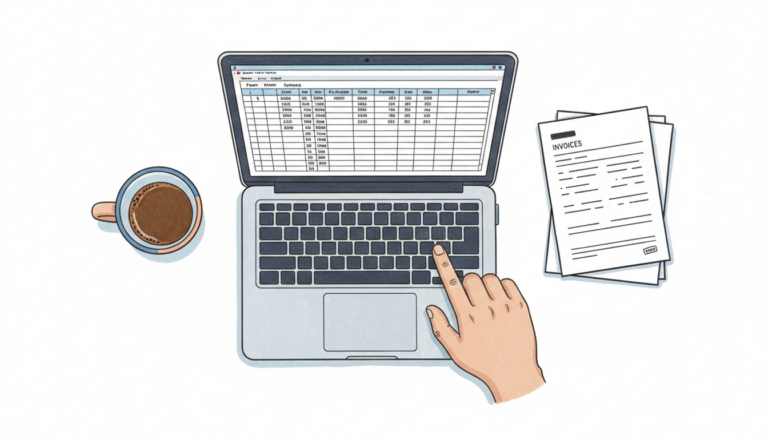
You open WooCommerce orders and set up your filters. Status: Processing. Date: This week. You click into an order to check the shipping address, hit back, and your filters are gone. Set them again. Navigate away. Gone again.
Every time you leave the orders page, WooCommerce forgets what you were looking at. Your column choices stick, but every filter value resets to nothing. Do that five times a day and you’ve burned ten minutes on setup alone.
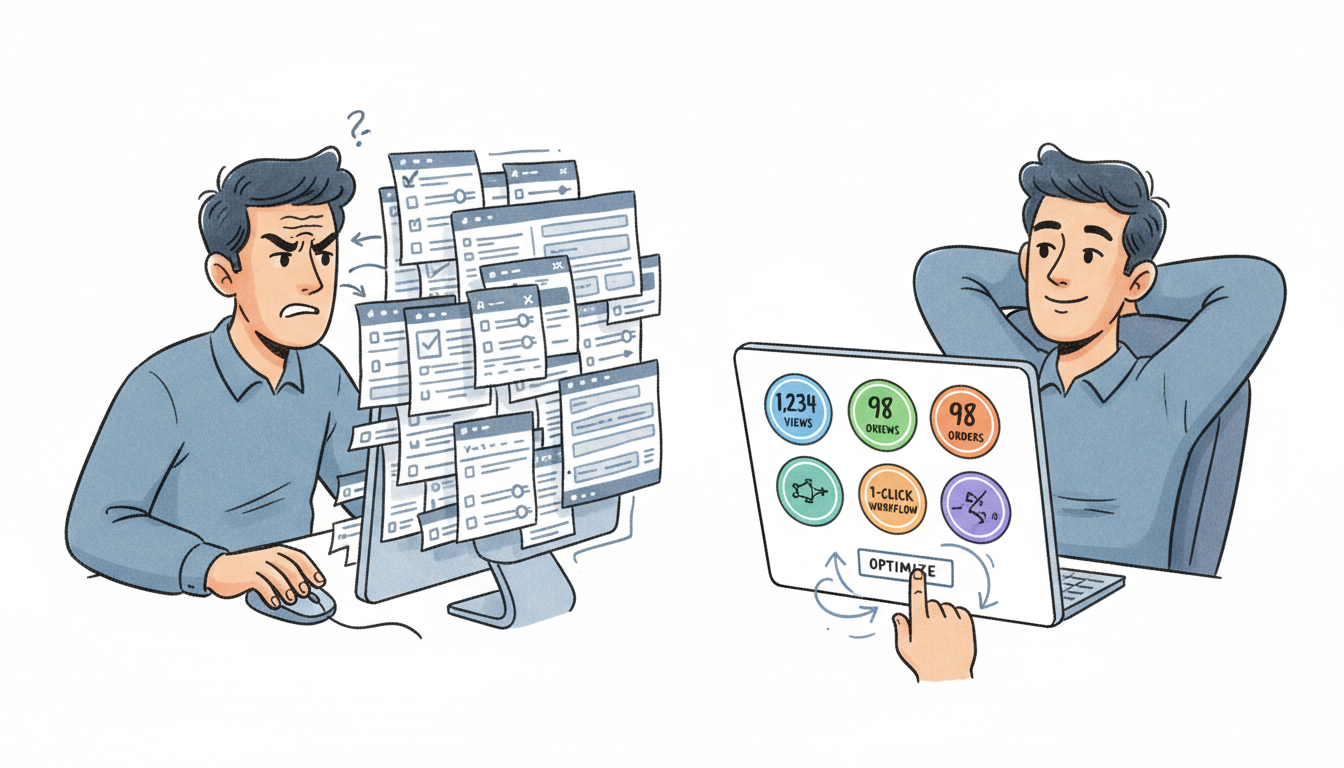
This is what saved views fix. One click restores your exact workspace – filters, columns, sort order, everything. Set it up once, use it every shift.
What a saved view actually stores
A custom view in OrderFusion captures your complete workspace:
- Which columns are visible (and their order)
- Which filters are enabled
- Current filter values (the status you selected, the date range, the product name)
- Settings like sort order and infinite scroll on/off
Load a view and every piece snaps back into place. No reconfiguring.
How to create your first view
1. Configure your workspace
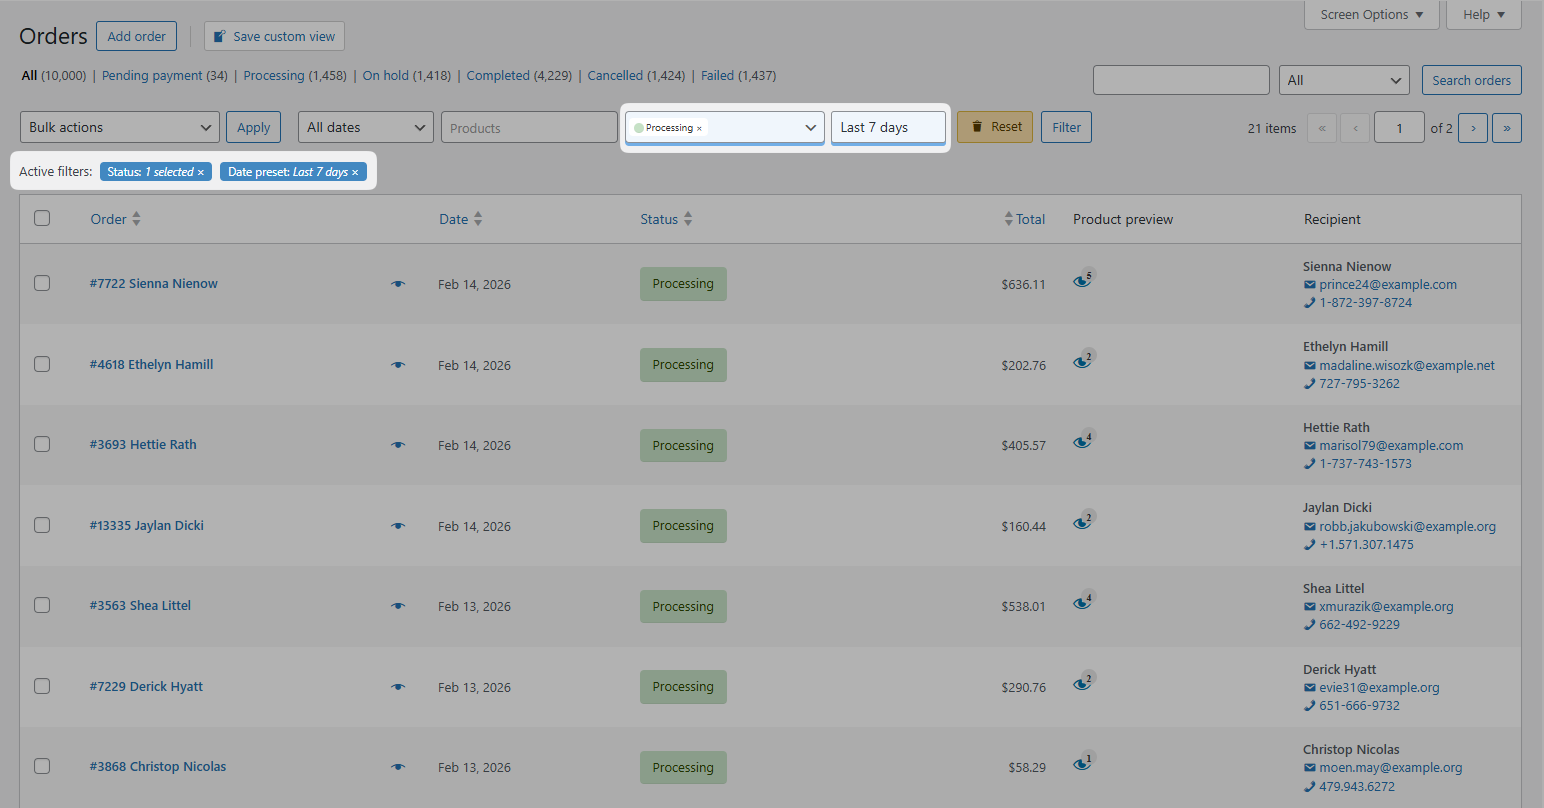
Go to WooCommerce > Orders. Enable the columns and filters you want through Screen Options. Set your filter values – pick a status, choose a date range, whatever you need.
2. Click the + button
Look for the custom views block above the orders list. Click + to create a new view. (First time? You’ll see a Create custom view button instead – same thing.)
3. Name it and save
Enter a descriptive name like “Daily Fulfillment” or “Support Queue.” Pick a color if you want visual separation. Check Pin this view to add a quick-access badge above your orders list. Click Save.
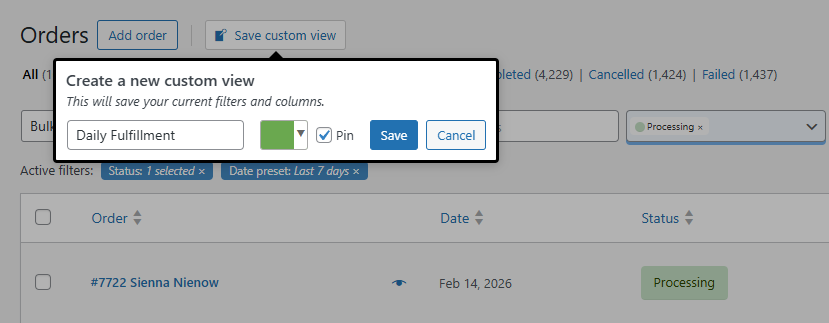
Your view now appears in the custom views dropdown. Click it, and your workspace rebuilds instantly.
Five views your team should have on day one
Every WooCommerce store with more than one person touching orders benefits from these.
1. Fulfillment queue
Who uses it: Warehouse staff
Columns: Order #, Products (popup preview), Tracking number, Shipping method, Ship-to state
Filters: Status set to Processing
Why: Hover the product preview icon to see thumbnail images for picking. Processing status limits the list to orders ready to ship. Ship-to state lets you batch by region.
2. Support queue
Who uses it: Customer service
Columns: Order #, Date, Customer name, Phone, Email, Products, Status, Order notes
Filters: Date range set to last 7 days
Why: Phone and email are right there – no clicking into each order. Order notes show what happened with each order – status changes, team comments, and follow-up actions.
3. Problem orders
Who uses it: Operations manager
Columns: Order #, Customer name, Status, Status history, Order notes, Total
Filters: Status set to On hold + Failed + Refunded
Why: Focuses on orders that need attention. Status history shows how they got there – did a payment fail and then recover, or is it stuck?
4. Financial review
Who uses it: Accounting
Columns: Order #, Date, Total, Payment method, Coupon, Invoice number, Status
Filters: Date range set to This month, Payment method set to Bank transfer + Check
Why: Manual payment methods need human verification. Coupon column catches discount abuse. Invoice numbers match your accounting software.
5. High-value VIP
Who uses it: Sales or account managers
Columns: Order #, Customer name, Customer role, Total, Products, Status, Ship-to country
Filters: Order total minimum $500
Why: Big orders deserve extra attention. Customer role identifies wholesale buyers who might need different fulfillment handling.
Pin views for one-click access
Creating a view is half the benefit. Pinning it is the other half.
Pinned views appear as badges above your orders list with live order counts:
[(23) Fulfillment] [(7) Support Queue] [(3) Problem Orders]
Those numbers update every time you load the orders screen. “(3) Problem Orders” means three orders need attention right now. Click the badge, and that view loads instantly.
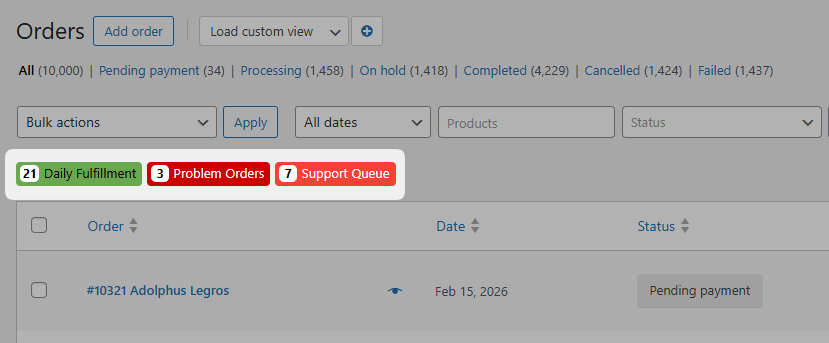
To pin a view: Open the custom views dropdown, find your view, and click the pin icon. Grey means unpinned. Red means pinned.
Pin two to four views. More than that clutters the bar and defeats the purpose.
Want to try this yourself? Install OrderFusion Lite (free) and start filtering orders in minutes. Need saved views, custom meta columns, or Products & Coupons page support? See OrderFusion Pro.
Team rules worth setting
Views are shared. Everyone on your team sees the same views in the dropdown. That’s powerful, but it needs ground rules.
Rule 1: Name views for the role, not the person.
“Sarah’s view” means nothing when Sarah leaves. “Fulfillment Queue” works for whoever fills that role next.
Rule 2: Don’t edit views other people depend on.
Only the creator can edit a view, which prevents accidents. But if you created a view the whole team uses, changing it affects everyone next time they load it. Create a new version instead. Let people switch when they’re ready.
Rule 3: Keep pin choices personal.
Pins are per-user. Your warehouse lead pins Fulfillment and Problem Orders. Your support lead pins Support Queue and High-Value VIP. Nobody needs to see all views at once.
Rule 4: Review views quarterly.
Filters that made sense six months ago might not match your current workflow. Seasonal views (“Holiday Rush Queue”) should be unpinned after the season. Dead views confuse new team members.
How views work across your team
Custom views are global – every team member sees the full list. But loading a view is personal. Your fulfillment lead loads “Ready to Ship” while your support agent loads “Support Queue.” They’re looking at different data from the same orders screen. Nobody steps on anyone else’s work.
Permissions work like this:
- Everyone can see and load all views
- Only the creator can edit or delete a view
- Anyone can copy a view (load it, click +, save as new) to make their own version
If a colleague built a view that’s almost right for you but needs different columns, don’t ask them to change it. Copy it and adjust your version.
Real scenario: Monday morning at a 500-order store
It’s 9 AM. You sell electronics and ship about 500 orders per week.
Without views, your warehouse manager opens WooCommerce orders and sees every order in every status. She enables filters, selects Processing, turns on the Products column, adds Tracking number. Two minutes of setup before she ships a single package.
With views, she clicks the “Fulfillment” badge. Done. The screen shows processing orders with product images and tracking fields. Live count says “(47) Fulfillment” – that’s today’s workload.
Meanwhile, your support agent clicks “Support Queue.” Different columns, different filters, same orders screen. He sees customer contact info and order notes. The phone rings and he types a name in the Customer Name filter to pull up their order.
At 5 PM, your operations manager clicks “Problem Orders.” Three orders stuck in Failed status. She opens each one, reads the status history, and decides what to do.
Three people, three workflows, zero time spent configuring.
Try it yourself
The fastest way to understand saved views is to build one. Open the demo, set up some filters, and save a view. Pin it. Watch the live count update.
Start with one view for your most repetitive daily task. Once you see the time savings, you’ll want views for everything.
For the full setup guide and more workflow examples, see the OrderFusion documentation.