Open your WooCommerce orders page right now. What do you see?
Order number, customer name, date, status, total. Billing and shipping addresses. That’s it.
No product names. No phone numbers. No way to filter by SKU. No way to find which orders used a specific coupon. You’re left clicking into each order individually, scanning the details, clicking back, and doing it again. At 15 seconds per order, checking 50 orders takes over 12 minutes. Do that three times a day and you’ve lost nearly 40 minutes to clicking.
The default WooCommerce orders page was built when stores had dozens of orders per week. Not hundreds per day. It shows you the bare minimum and expects you to figure out the rest.
You don’t need to write PHP. You don’t need a developer. You can fix this in about five minutes with a free plugin.
What’s actually missing
Here’s what the default orders page forces you to do:
Find out which products are in an order? Click into the order. Every single time. There’s no product column.
Call a customer about their order? Click into the order, scroll to billing details, copy the phone number. For each customer.
Find all orders containing a specific product? You can’t. The search box doesn’t look at line items. Your only option is scrolling and clicking.
Find orders above a certain total? Sort by total and eyeball it. No range filter exists.
Filter by shipping method or payment gateway? Not possible.
This isn’t a WooCommerce limitation you have to accept. It’s a default you can change.
Add filters to find orders in seconds
OrderFusion Lite adds seven filters to your orders page. Here’s how the most useful ones work in practice.
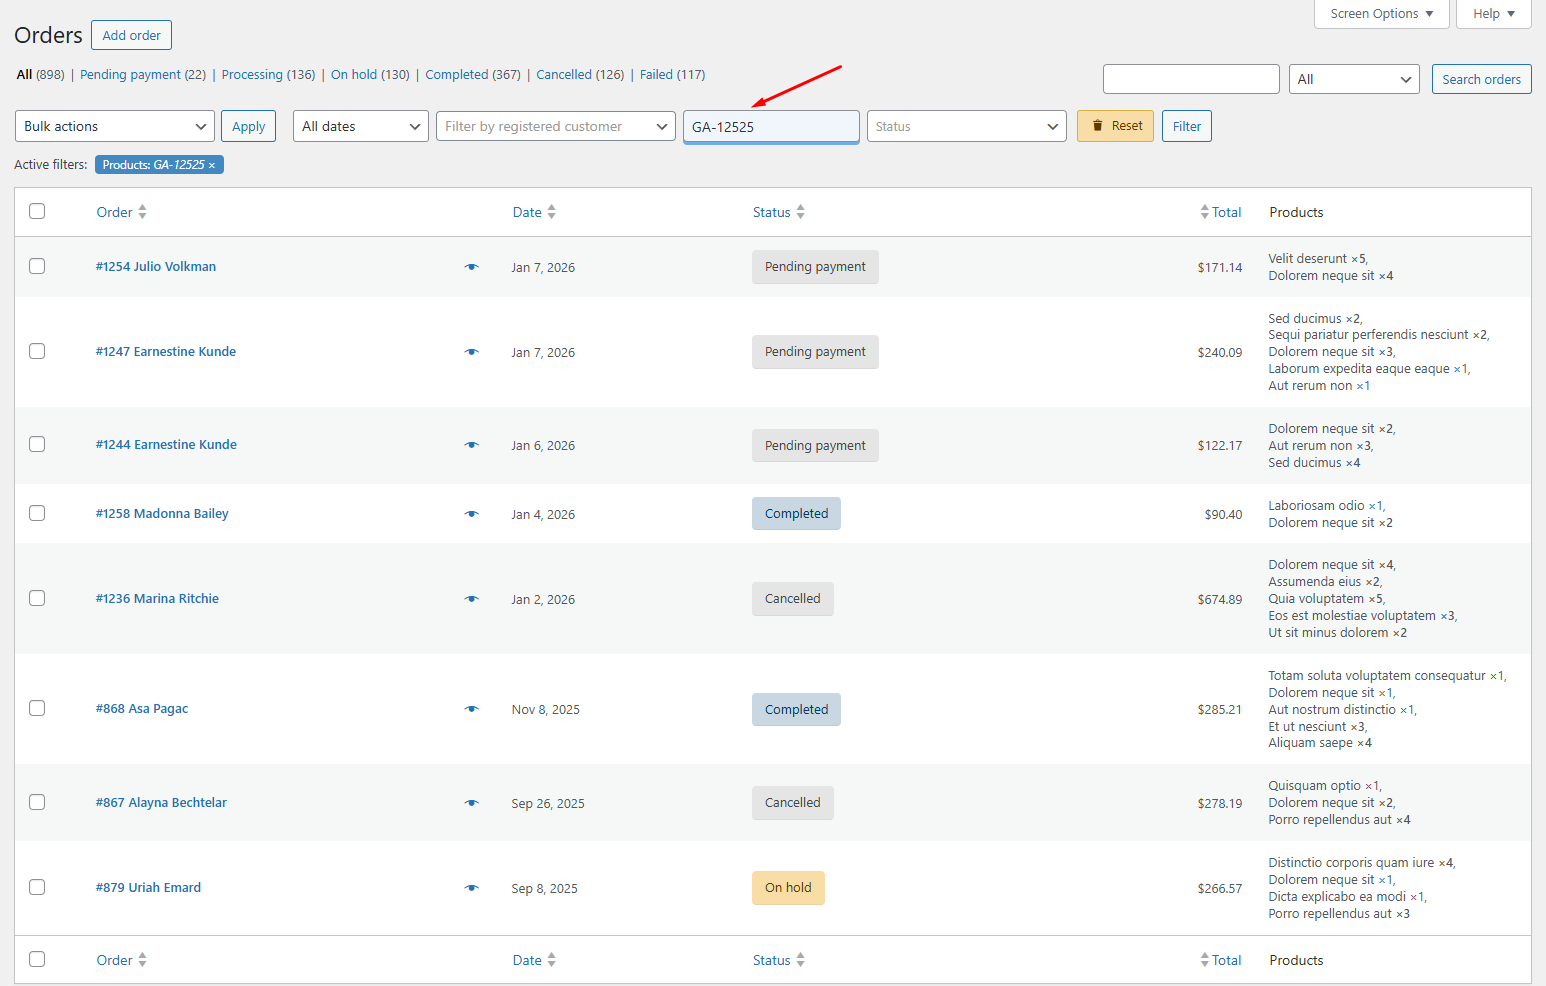
Filter by product or SKU
Type a product name, SKU, UPC, EAN, or GTIN into the Products filter. Every order containing that product appears instantly.
When to use this: a supplier notifies you that batch #4812 of a product has a defect. You need every order that contains it. Without a product filter, you’d export all orders and search a spreadsheet. With it, you type the SKU and get your list in seconds.
Filter by order total range
Set a minimum and maximum order total. Set the minimum to $500 (or whatever “high value” means for your store) and you see only the orders worth prioritizing.
Works the other direction too. Set the maximum to $0 and you’ll find all fully-refunded orders.
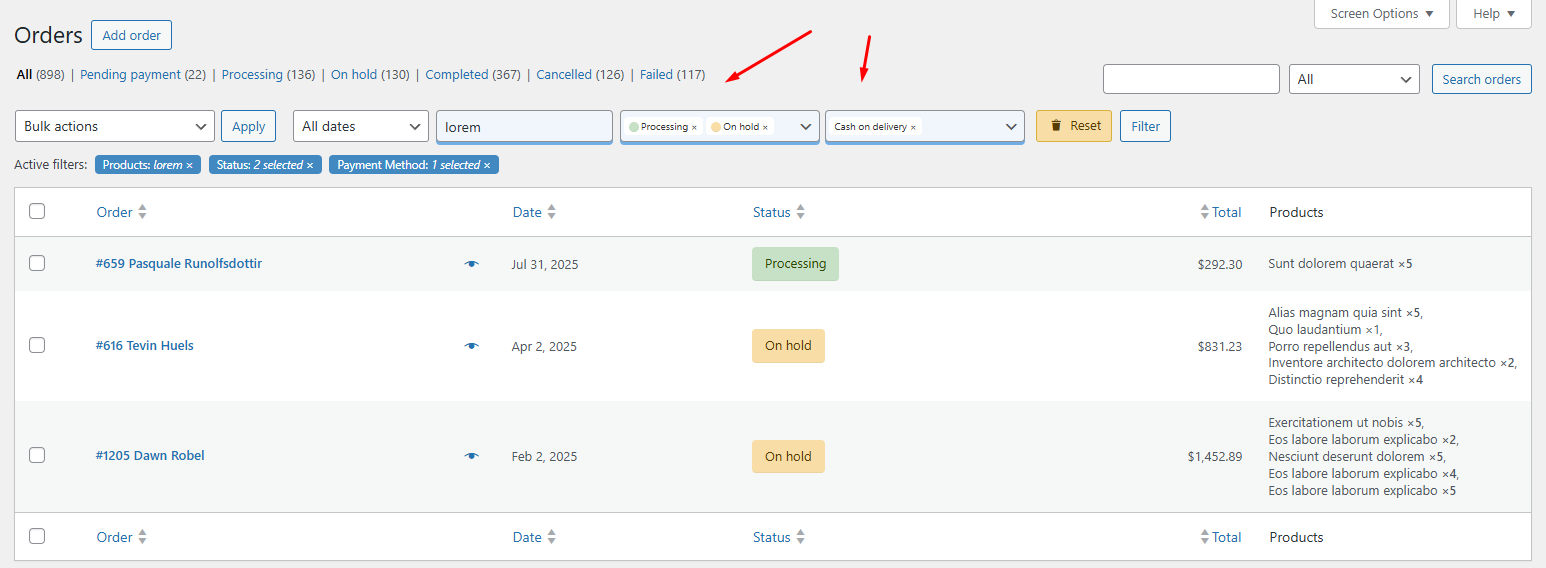
Combine filters for precision
Filters stack. Payment method = “Cash on Delivery” + Order total > $200 gives you high-value COD orders that need extra verification before shipping. Status = “On Hold” + Shipping method = “Express” shows you urgent orders that are stuck.
You set filters once, get your results, process them. When you need a different view, change the filters. The orders page becomes a tool you control instead of a list you scroll through.
Add columns you actually need
The default orders list shows order number, date, status, and total. OrderFusion Lite lets you add four more columns directly to the list.
Products column
See which products are in each order without clicking into it. The products column shows a text list of items and quantities right in the orders table.
This alone saves the most time. No more opening orders just to check what’s inside.
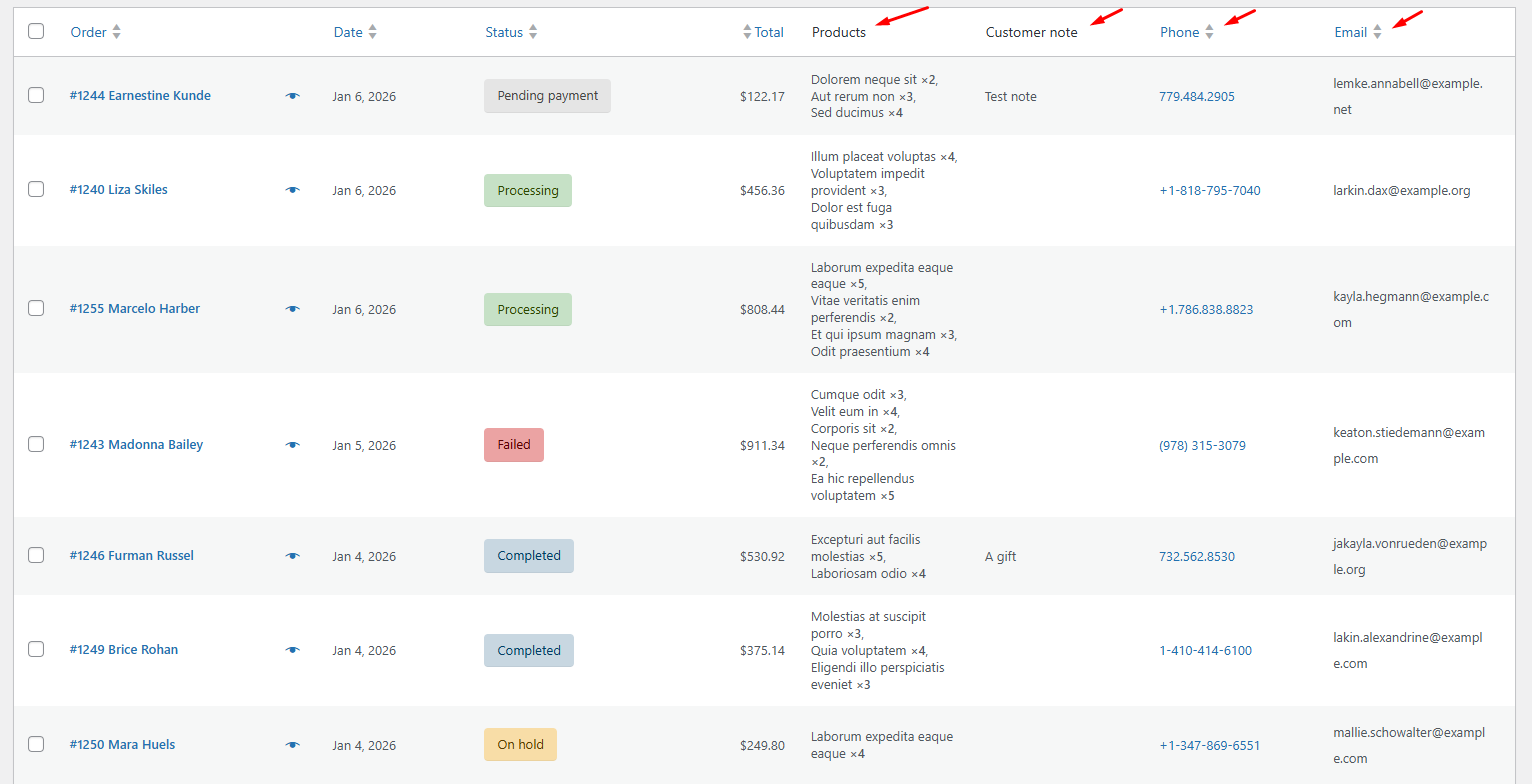
Phone and email columns
Add clickable phone numbers and email addresses directly to your orders list. Click a phone number and your system starts a call. Click an email and your mail client opens with the address filled in.
For stores that handle support directly from the orders page, this cuts the steps to contact a customer from five clicks to one.
Customer note column
See checkout notes without opening orders. Customers who request gift wrapping, specific delivery times, or special instructions show up right in the list. You spot them while scanning your orders instead of discovering them after you’ve already packed the shipment.
How to set it up
Go to Screen Options at the top of your WooCommerce orders page. You’ll see new sections for filters and columns. Check the ones you want, arrange the column order, and click Apply. Your choices persist between sessions – set it once and it stays.
The whole setup takes less than five minutes. There’s nothing to configure in a separate settings page.
Want to try this yourself? Install OrderFusion Lite (free) and start filtering orders in minutes. Need saved views, custom meta columns, or Products & Coupons page support? See OrderFusion Pro.
Export filtered orders to CSV
After filtering your orders, you can export the visible results to CSV. Select specific orders or export all filtered results.
The practical use: filter for orders from the last 30 days with a specific payment method, then export that set for your accountant. Filter for orders containing a specific product, then export for a supplier report. You filter first, then export exactly what you need instead of exporting everything and cleaning up the spreadsheet afterward.
When you need more
OrderFusion Lite covers the orders page. If you manage products and coupons with the same intensity, the Pro version extends the same filters-and-columns approach to those pages too. It also adds saved views (one-click workspace switching for different workflows), custom columns and filters built from any order meta field, and batch export for stores with tens of thousands of orders.
But start with Lite. It’s free, it works with HPOS (WooCommerce’s newer order storage system) and multisite, and the seven filters plus four columns handle most of what store owners ask for. If you hit the ceiling later, upgrading keeps all your settings.
Try it
Install OrderFusion Lite from WordPress.org – it takes about a minute. Go to WooCommerce > Orders, open Screen Options, and turn on the filters and columns that match your workflow.
If you want to see the full feature set (Lite and Pro) before installing anything, the live demo has sample orders loaded and every filter turned on.